> For the complete documentation index, see [llms.txt](https://docs.carto.com/llms.txt). Markdown versions of documentation pages are available by appending `.md` to page URLs; this page is available as [Markdown](https://docs.carto.com/carto-self-hosted/configuration/data-and-storage/configure-your-own-buckets.md).
# Configure your own buckets
Configure CARTO Self-Hosted to use your cloud storage buckets
This guide covers how to configure CARTO to use your cloud storage buckets. If you haven't created and configured them yet (CORS, IAM permissions), start with [Object Storage prerequisites](/carto-self-hosted/planning/prerequisites/object-storage.md) first.
Every CARTO Self-Hosted installation requires the following buckets:
{% tabs %}
{% tab title="☸️ Kots (Admin Console)" %}
| Bucket | Required | Description | Example contents |
| ----------------- | -------- | ---------------------------------------------------------------------------------- | --------------------------- |
| **Temp Bucket** | Yes | Upload and import datasets into CARTO | `.csv`, `.geojson`, `.zip` |
| **Assets Bucket** | Yes | Stores map thumbnails and customization assets (logos, markers, etc.) | `.png` |
| **Export Bucket** | Optional | Export data from your data warehouse — create only if you use data export features | `.csv`, `.json`, `.parquet` |
| {% endtab %} | | | |
{% tab title="🛞 Helm (customizations.yaml)" %}
| Bucket | Required | Config key | Description | Example contents |
| --------------------- | -------- | ------------------------------------------------------------ | ---------------------------------------------------------------------------------- | --------------------------- |
| **Import Bucket** | Yes | `workspaceImportsBucket` | Upload and import datasets into CARTO | `.csv`, `.geojson`, `.zip` |
| **Thumbnails Bucket** | Yes | `workspaceThumbnailsBucket` | Stores map thumbnails and customization assets (logos, markers, etc.) | `.png` |
| **Export Bucket** | Optional | `workspaceExportsBucket` (BigQuery) / `awsExportBucket` (S3) | Export data from your data warehouse — create only if you use data export features | `.csv`, `.json`, `.parquet` |
| {% endtab %} | | | | |
| {% endtabs %} | | | | |
***
## Configuration notes
### Assets / Thumbnails bucket access
By default, all thumbnail objects are configured to be **publicly accessible**. This ensures that features like custom branding and map markers function correctly.
{% tabs %}
{% tab title="☸️ Kots (Admin Console)" %}
You can change this in the Admin Console using the "**Assets bucket is Public**" config.
{% hint style="warning" %}
Setting the bucket to private will disable the public markers feature since it relies on public image assets.
{% endhint %}
{% endtab %}
{% tab title="🛞 Helm (customizations.yaml)" %}
To make thumbnails private, set in your customizations.yaml:
```yaml
appConfigValues:
workspaceThumbnailsPublic: "false"
```
{% hint style="warning" %}
Some features (branding, custom markers) require **public access**.
{% endhint %}
{% endtab %}
{% endtabs %}
To maintain a private bucket while still enabling these features, configure your bucket with a hybrid access model:
1. **Allow public objects**: The bucket policy must allow individual objects to be made public, even if the bucket itself is private by default.
2. **Enable fine-grained ACLs**: Enable Access Control Lists (ACLs) so CARTO can set `public-read` permissions on specific thumbnail files.
3. **Disable server-side encryption**: Bucket-level server-side encryption is often incompatible with public ACLs and must be disabled.
### Export bucket provider requirements
Two warehouses require a specific provider, because they write the export file themselves. The rest work with any supported store, since CARTO reads the query result and writes the file:
| Data Warehouse | Required Storage Provider | Why |
| --------------------------------------------- | ------------------------------------------------------------------------------ | -------------------------------------- |
| **BigQuery** | Google Cloud Storage | `EXPORT DATA` writes to GCS only |
| **Redshift** | AWS S3 | `COPY` and `UNLOAD` accept AWS S3 only |
| **Snowflake, Oracle, PostgreSQL, Databricks** | Any bucket CARTO supports — GCS, AWS S3, Azure Blob, or an S3-compatible store | CARTO writes the file |
***
## Bucket configuration
{% tabs %}
{% tab title="☸️ Kots (Admin Console)" %}
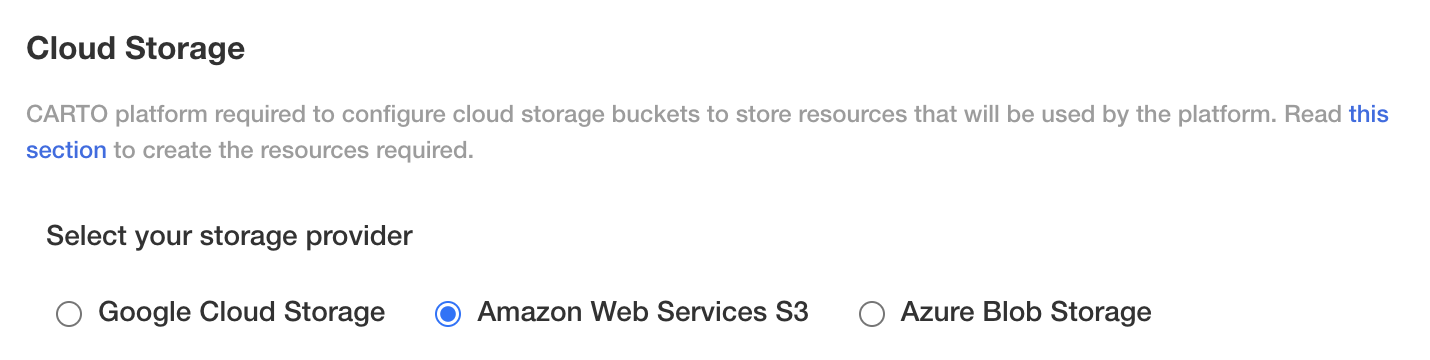
In the Admin Console → Config, select your preferred storage provider:
{% tabs %}
{% tab title="Google Cloud Storage" %}
1. Create the following buckets in GCS:
* **Assets Bucket**
* **Temp Bucket**
* Optionally, create the **Data export Bucket** if you plan to export data from your data warehouse.
{% hint style="info" %}
Custom markers won't work unless the Assets bucket is public.
{% endhint %}
2. Configure CORS on the Temp and Assets buckets:
```json
[
{
"origin": ["*"],
"method": ["GET", "PUT", "POST"],
"responseHeader": [
"Content-Type", "Content-MD5", "Content-Disposition",
"Cache-Control", "x-goog-content-length-range", "x-goog-meta-filename"
],
"maxAgeSeconds": 3600
}
]
```
{% hint style="info" %}
How do I set up CORS? Check the [provider docs](https://cloud.google.com/storage/docs/using-cors).
{% endhint %}
3. Ensure the identity used to access your GCS buckets has the `roles/storage.admin` role over the buckets.
4. In the Admin Console, provide the **Project ID** of the GCP project where your GCS buckets are located.
5. Specify the names of the GCS buckets.
{% endtab %}
{% tab title="AWS S3" %}
1. Create the following buckets in your AWS S3 account:
* **Assets Bucket**
* **Temp Bucket**
* **Data export Bucket** (optional)
{% hint style="info" %}
Custom markers won't work unless the Assets bucket is public.
{% endhint %}
{% hint style="danger" %}
When creating your S3 buckets:
* **ACLs must be enabled.**
* If server-side encryption is enabled, the user must be granted KMS key permissions (see [AWS documentation](https://repost.aws/knowledge-center/s3-bucket-access-default-encryption)).
{% endhint %}
2. Configure CORS on the Temp and Assets buckets:
```json
[
{
"AllowedHeaders": ["Content-Type", "Content-MD5", "Content-Disposition", "Cache-Control"],
"AllowedMethods": ["PUT", "POST", "GET"],
"AllowedOrigins": ["*"],
"ExposeHeaders": [],
"MaxAgeSeconds": 3600
}
]
```
{% hint style="info" %}
How do I set up CORS? Check the [provider docs](https://docs.aws.amazon.com/AmazonS3/latest/userguide/enabling-cors-examples.html).
{% endhint %}
3. Provide an **Access Key ID** and **Secret Access Key** with read/write access over the buckets.
4. Configure the **region** where the buckets are located. All buckets must be in the same AWS region.
5. Specify the names of the AWS buckets.
**For Redshift exports** — create an IAM role with the following settings:
Trusted entity type: `Custom trust policy` — replace ``:
```json
{
"Version": "2012-10-17",
"Statement": [
{
"Effect": "Allow",
"Principal": { "AWS": "" },
"Action": ["sts:AssumeRole", "sts:TagSession"]
}
]
}
```
Add permissions (omit export bucket if not needed):
```json
{
"Version": "2012-10-17",
"Statement": [
{ "Effect": "Allow", "Action": "s3:ListBucket", "Resource": "arn:aws:s3:::" },
{ "Effect": "Allow", "Action": "s3:*Object", "Resource": "arn:aws:s3:::/*" },
{ "Effect": "Allow", "Action": "s3:ListBucket", "Resource": "arn:aws:s3:::" },
{ "Effect": "Allow", "Action": "s3:*Object", "Resource": "arn:aws:s3:::/*" }
]
}
```
Specify the ARN of the role and the name of the exports bucket in the CARTO Self-Hosted configuration.
{% hint style="info" %}
In case you'd like to enable importing data to Redshift, it's not mandatory to provide the exports bucket's name, but you'll have to follow [these instructions](/carto-user-manual/settings/advanced-settings/configuring-s3-bucket-for-redshift-imports.md) once the CARTO Self-Hosted deployment is ready.
{% endhint %}
**For Snowflake exports on AWS S3** — create an IAM role with the same trust policy and the following permissions policy:
```json
{
"Version": "2012-10-17",
"Statement": [
{ "Effect": "Allow", "Action": "s3:ListBucket", "Resource": "arn:aws:s3:::" },
{ "Effect": "Allow", "Action": "s3:*Object", "Resource": "arn:aws:s3:::/*" }
]
}
```
Specify the ARN of the role and the data export bucket name in the CARTO Self-Hosted configuration.
{% endtab %}
{% tab title="Azure Blob Storage" %}
1. Create the following containers in your Azure Blob storage account:
* **Assets Bucket**
* **Temp Bucket**
* **Data export Bucket** (optional)
{% hint style="info" %}
Custom markers won't work unless the Assets bucket is public.
{% endhint %}
2. Configure CORS on the Temp and Assets buckets at the **storage account level**:
```json
[
{
"AllowedOrigins": ["*"],
"AllowedMethods": ["GET", "PUT", "POST"],
"AllowedHeaders": [
"Content-Type", "Content-MD5", "Content-Disposition",
"Cache-Control", "x-ms-blob-type",
"Access-Control-Request-Headers"
],
"ExposedHeaders": [],
"MaxAgeInSeconds": 3600
}
]
```
{% hint style="info" %}
If you're using the Azure Portal, these fields map directly to the CORS blade's columns: **Allowed origins**, **Allowed methods**, **Allowed headers**, **Exposed headers**, and **Max age**. Enter the values as plain comma-separated names, **without the JSON quotes or brackets** — pasted quotes become part of the stored header names, and Azure will then silently reject upload (PUT) preflights while GET keeps working. How do I set up CORS? Check the [provider docs](https://learn.microsoft.com/en-us/rest/api/storageservices/cross-origin-resource-sharing--cors--support-for-the-azure-storage-services#enabling-cors-for-azure-storage).
{% endhint %}
3. Provide an **Access Key** from the storage account's Security properties.
4. Specify the names of the containers.
{% endtab %}
{% tab title="S3-compatible" %}
Select **AWS S3 or S3-compatible** as the storage provider and follow the **AWS S3** steps above for buckets, CORS, and access keys. Then fill in:
| Field | Value |
| ------------------------------ | ---------------------------------------------------------------------------- |
| **S3-compatible endpoint** | Your endpoint, e.g. `https://objects.example.com` |
| **Use path-style addressing** | Enable unless your provider supports virtual-hosted URLs |
| **S3-compatible external URL** | Only if browsers reach the store at a different URL than CARTO's services do |
Leave the region as your provider documents it, or `us-east-1` if it doesn't use regions.
{% endtab %}
{% endtabs %}
{% endtab %}
{% tab title="🛞 Helm (customizations.yaml)" %}
{% tabs %}
{% tab title="Google Cloud Storage" %}
Add the following lines to your customizations.yaml and replace the `` with your own settings:
```yaml
appConfigValues:
storageProvider: "gcp"
workspaceImportsBucket:
workspaceImportsPublic:
workspaceThumbnailsBucket:
workspaceThumbnailsPublic:
thumbnailsBucketExternalURL:
googleCloudStorageProjectId:
```
> `thumbnailsBucketExternalURL` can be `https://storage.googleapis.com//` for public access or `https://storage.cloud.google.com//` for authenticated access.
Select a **Service Account** that will be used by CARTO to interact with the buckets:
* Using a custom Service Account for both buckets and CARTO services (required for Workload Identity).
* Using a dedicated Service Account **only for the buckets**.
Grant the selected Service Account the role `roles/iam.serviceAccountTokenCreator` at the Service Account permissions level (not project level).
Grant the selected Service Account the role `roles/storage.admin` on the buckets.
**\[OPTIONAL]** Pass GCP credentials as secrets — only if using a dedicated Service Account for buckets:
Option 1 — automatically create the secret:
```yaml
appSecrets:
googleCloudStorageServiceAccountKey:
value: |
```
> `appSecrets.googleCloudStorageServiceAccountKey.value` should be in plain text, preserving multiline format.
Option 2 — using an existing secret:
```bash
kubectl create secret generic \
[-n my-namespace] \
mycarto-google-storage-service-account \
--from-file=key=
```
```yaml
appSecrets:
googleCloudStorageServiceAccountKey:
existingSecret:
name: mycarto-google-storage-service-account
key: key
```
{% endtab %}
{% tab title="AWS S3" %}
Add the following lines to your customizations.yaml and replace the `` with your own settings:
```yaml
appConfigValues:
storageProvider: "s3"
workspaceImportsBucket:
workspaceImportsPublic:
workspaceThumbnailsBucket:
workspaceThumbnailsPublic:
thumbnailsBucketExternalURL:
awsS3Region:
```
> `thumbnailsBucketExternalURL` should be `https://.s3.amazonaws.com/`
Pass your AWS credentials as secrets:
Option 1 — automatically create a secret:
```yaml
appSecrets:
awsAccessKeyId:
value: ""
awsAccessKeySecret:
value: ""
```
> `appSecrets.awsAccessKeyId.value` and `appSecrets.awsAccessKeySecret.value` should be in plain text.
Option 2 — using an existing secret:
```bash
kubectl create secret generic \
[-n my-namespace] \
mycarto-custom-s3-secret \
--from-literal=awsAccessKeyId= \
--from-literal=awsSecretAccessKey=
```
> Use the same namespace where you are installing the Helm chart.
```yaml
appSecrets:
awsAccessKeyId:
existingSecret:
name: mycarto-custom-s3-secret
key: awsAccessKeyId
awsAccessKeySecret:
existingSecret:
name: mycarto-custom-s3-secret
key: awsSecretAccessKey
```
{% endtab %}
{% tab title="Azure Blob Storage" %}
Add the following lines to your customizations.yaml and replace the `` with your own settings:
```yaml
appConfigValues:
storageProvider: "azure-blob"
azureStorageAccount:
workspaceImportsBucket:
workspaceImportsPublic:
workspaceThumbnailsBucket:
thumbnailsBucketExternalURL:
workspaceThumbnailsPublic:
```
> `thumbnailsBucketExternalURL` should be `https://.blob.core.windows.net//`. This is required regardless of `workspaceThumbnailsPublic` — it's used to allow the frontend to load images from that origin, not to grant bucket access.
Pass your Access Key as a secret:
Option 1 — automatically create the secret:
```yaml
appSecrets:
azureStorageAccessKey:
value: ""
```
> `appSecrets.azureStorageAccessKey.value` should be in plain text.
Option 2 — using an existing secret:
```bash
kubectl create secret generic \
[-n my-namespace] \
mycarto-custom-azure-secret \
--from-literal=azureStorageAccessKey=
```
```yaml
appSecrets:
azureStorageAccessKey:
existingSecret:
name: mycarto-custom-azure-secret
key: azureStorageAccessKey
```
{% endtab %}
{% tab title="S3-compatible" %}
Configure the buckets and credentials exactly as in the **AWS S3** tab (`storageProvider: "s3"`), then add your endpoint:
```yaml
appConfigValues:
s3Endpoint: "https://objects.example.com"
s3ForcePathStyle: true
# Only if browsers reach the store at a different URL:
# s3ExternalUrl: "https://objects.public.example.com"
```
* `s3Endpoint` — where CARTO's services reach your store. Leave empty for AWS S3.
* `s3ForcePathStyle` — S3 supports two URL shapes: virtual-hosted (`https://bucket.host/key`) and path-style (`https://host/bucket/key`). Most S3-compatible providers serve a single hostname and need path-style, which requires no wildcard DNS. Leave `false` for AWS S3.
* `s3ExternalUrl` — browsers upload and download objects directly, so they must reach the store too. Set this only when the browser-facing URL differs from the one your cluster uses, for example an in-cluster service name internally and a public hostname externally.
Set `thumbnailsBucketExternalURL` to the browser-facing URL of the thumbnails bucket, following your provider's URL shape.
{% hint style="warning" %}
Whatever URL browsers use must allow CORS from your CARTO origin, or uploads and downloads fail in the browser while working server-side. The install preflight checks this.
{% endhint %}
{% endtab %}
{% endtabs %}
{% endtab %}
{% endtabs %}
***
## Data export bucket
{% tabs %}
{% tab title="☸️ Kots (Admin Console)" %}
When your export bucket is in AWS S3, Redshift and Snowflake exports need an IAM role. Refer to the Redshift and Snowflake configuration steps in the **AWS S3** tab above, then specify the ARN and bucket name in the Admin Console.
{% endtab %}
{% tab title="🛞 Helm (customizations.yaml)" %}
### BigQuery
1. Grant read/write permissions to the CARTO service account on the GCS export bucket.
2. Add to your customizations.yaml:
```yaml
appConfigValues:
workspaceExportsBucket:
```
### Redshift
Redshift requires an AWS S3 bucket for data exports, because its `COPY` and `UNLOAD` commands accept AWS S3 only. Create an IAM user with programmatic credentials if not already done.
{% hint style="info" %}
If you already configured the Import and Thumbnails buckets using AWS S3, you can reuse the same IAM user.
{% endhint %}
Create an IAM role with the following settings:
1. Trusted entity type: `Custom trust policy` — replace ``:
```json
{
"Version": "2012-10-17",
"Statement": [
{
"Effect": "Allow",
"Principal": { "AWS": "" },
"Action": ["sts:AssumeRole", "sts:TagSession"]
}
]
}
```
2. Add permissions policy — replace ``:
```json
{
"Version": "2012-10-17",
"Statement": [
{ "Effect": "Allow", "Action": "s3:ListBucket", "Resource": "arn:aws:s3:::" },
{ "Effect": "Allow", "Action": "s3:*Object", "Resource": "arn:aws:s3:::/*" }
]
}
```
3. Update your customizations.yaml:
```yaml
appConfigValues:
awsExportBucket:
awsExportBucketRegion:
exportAwsRoleArn:
```
Pass your AWS credentials as secrets:
Option 1 — automatically create the secret:
```yaml
appSecrets:
exportAwsSecretAccessKey:
value:
exportAwsAccessKeyId:
value:
```
> `appSecrets.exportAwsSecretAccessKey.value` and `appSecrets.exportAwsAccessKeyId.value` should be in plain text, preserving the multiline and correctly tabulated.
Option 2 — using an existing secret:
```bash
kubectl create secret generic \
[-n my-namespace] \
mycarto-export-aws-access-key \
--from-literal=key-id= \
--from-literal=key-secret=
```
```yaml
appSecrets:
exportAwsSecretAccessKey:
existingSecret:
name: mycarto-export-aws-access-key
key: key-id
exportAwsAccessKeyId:
existingSecret:
name: mycarto-export-aws-access-key-id
key: key-secret
```
### Amazon RDS for PostgreSQL
The export bucket for Amazon RDS can be configured from the CARTO platform UI after deployment. See [Configuring S3 bucket integration for Amazon RDS for PostgreSQL exports](/carto-user-manual/settings/advanced-settings/configuring-s3-bucket-integration-for-rds-for-postgresql-exports-in-builder.md).
{% endtab %}
{% endtabs %}
---
# Agent Instructions
This documentation is published with GitBook. GitBook is the documentation platform designed so that both humans and AI agents can read, navigate, and reason over technical content effectively. Learn more at gitbook.com.
## Querying This Documentation
If you need additional information that is not directly available in this page, you can query the documentation by asking a question.
Perform an HTTP GET request on the following URL with the `ask` and `goal` query parameters:
```
GET https://docs.carto.com/carto-self-hosted/configuration/data-and-storage/configure-your-own-buckets.md?ask=&goal=
```
`ask` is the immediate question: it should be specific, self-contained, and written in natural language.
`goal` is what the user is ultimately trying to achieve, the reason they need the answer. Sharing it helps GitBook give you a better, more relevant answer. A goal is most helpful when it describes the outcome the user wants rather than restating the question. For example, with `ask=how do I create an API token`, a goal like `automate deployments from our CI pipeline` lets GitBook tailor the answer to that use case.
The response will contain a direct answer to the question and relevant excerpts and sources from the documentation.
Use this mechanism when the answer is not explicitly present in the current page, you need clarification or additional context, or you want to retrieve related documentation sections.
.png?alt=media)
 You can change this in the Admin Console using the "**Assets bucket is Public**" config.
 To make thumbnails private, set in your customizations.yaml:
```yaml
appConfigValues:
workspaceThumbnailsPublic: "false"
```
{% hint style="warning" %}
Some features (branding, custom markers) require **public access**.
{% endhint %}
{% endtab %}
{% endtabs %}
To maintain a private bucket while still enabling these features, configure your bucket with a hybrid access model:
1. **Allow public objects**: The bucket policy must allow individual objects to be made public, even if the bucket itself is private by default.
2. **Enable fine-grained ACLs**: Enable Access Control Lists (ACLs) so CARTO can set `public-read` permissions on specific thumbnail files.
3. **Disable server-side encryption**: Bucket-level server-side encryption is often incompatible with public ACLs and must be disabled.
### Export bucket provider requirements
Two warehouses require a specific provider, because they write the export file themselves. The rest work with any supported store, since CARTO reads the query result and writes the file:
| Data Warehouse | Required Storage Provider | Why |
| --------------------------------------------- | ------------------------------------------------------------------------------ | -------------------------------------- |
| **BigQuery** | Google Cloud Storage | `EXPORT DATA` writes to GCS only |
| **Redshift** | AWS S3 | `COPY` and `UNLOAD` accept AWS S3 only |
| **Snowflake, Oracle, PostgreSQL, Databricks** | Any bucket CARTO supports — GCS, AWS S3, Azure Blob, or an S3-compatible store | CARTO writes the file |
***
## Bucket configuration
{% tabs %}
{% tab title="☸️ Kots (Admin Console)" %}
To make thumbnails private, set in your customizations.yaml:
```yaml
appConfigValues:
workspaceThumbnailsPublic: "false"
```
{% hint style="warning" %}
Some features (branding, custom markers) require **public access**.
{% endhint %}
{% endtab %}
{% endtabs %}
To maintain a private bucket while still enabling these features, configure your bucket with a hybrid access model:
1. **Allow public objects**: The bucket policy must allow individual objects to be made public, even if the bucket itself is private by default.
2. **Enable fine-grained ACLs**: Enable Access Control Lists (ACLs) so CARTO can set `public-read` permissions on specific thumbnail files.
3. **Disable server-side encryption**: Bucket-level server-side encryption is often incompatible with public ACLs and must be disabled.
### Export bucket provider requirements
Two warehouses require a specific provider, because they write the export file themselves. The rest work with any supported store, since CARTO reads the query result and writes the file:
| Data Warehouse | Required Storage Provider | Why |
| --------------------------------------------- | ------------------------------------------------------------------------------ | -------------------------------------- |
| **BigQuery** | Google Cloud Storage | `EXPORT DATA` writes to GCS only |
| **Redshift** | AWS S3 | `COPY` and `UNLOAD` accept AWS S3 only |
| **Snowflake, Oracle, PostgreSQL, Databricks** | Any bucket CARTO supports — GCS, AWS S3, Azure Blob, or an S3-compatible store | CARTO writes the file |
***
## Bucket configuration
{% tabs %}
{% tab title="☸️ Kots (Admin Console)" %}