> For the complete documentation index, see [llms.txt](https://docs.carto.com/llms.txt). Markdown versions of documentation pages are available by appending `.md` to page URLs; this page is available as [Markdown](https://docs.carto.com/carto-self-hosted/configuration/ai-features/configure-carto-ai-prerequisites.md).
# Configure CARTO AI prerequisites
For CARTO Self-Hosted
This guide provides instructions for **enabling the necessary prerequisites to run CARTO AI features** in a Self-Hosted environment. It covers configuration changes, deployment steps, and validation of the AI proxy resources.
{% hint style="info" %}
For Single VM Deployments check the hardware requirements when enabling AI Features [here](/carto-for-developers/key-concepts/architecture.md).
{% endhint %}
## 1. Requirements
Before modifying the configuration, you must prepare your **database** and **network** environment.
{% hint style="info" %}
If your deployment restricts outbound network traffic (e.g., via a firewall or proxy), make sure the required AI provider domains are whitelisted. See the [egress requirements](/carto-self-hosted/planning/prerequisites/network/egress.md) for the full list.
{% endhint %}
{% hint style="warning" %}
Ensure your PostgreSQL password does not contain URI-special characters (`@`, `#`, `%`, etc.), as the AI Proxy builds database connection URLs internally.
{% endhint %}
{% tabs %}
{% tab title="Kots" %}
### 1.1. Create 'aiproxy' database
The AI Proxy service requires its own dedicated logical database within your PostgreSQL instance. The default recommended name is `aiproxy`.
* Connect to your PostgreSQL instance and run:
```sql
CREATE DATABASE aiproxy;
```
#### 1.1.1 Identify the database user
You must identify the specific database user currently configured for your deployment to grant it permissions later.
* Login to the **KOTS** **Admin Console.**
* Navigate to the **Config** tab.
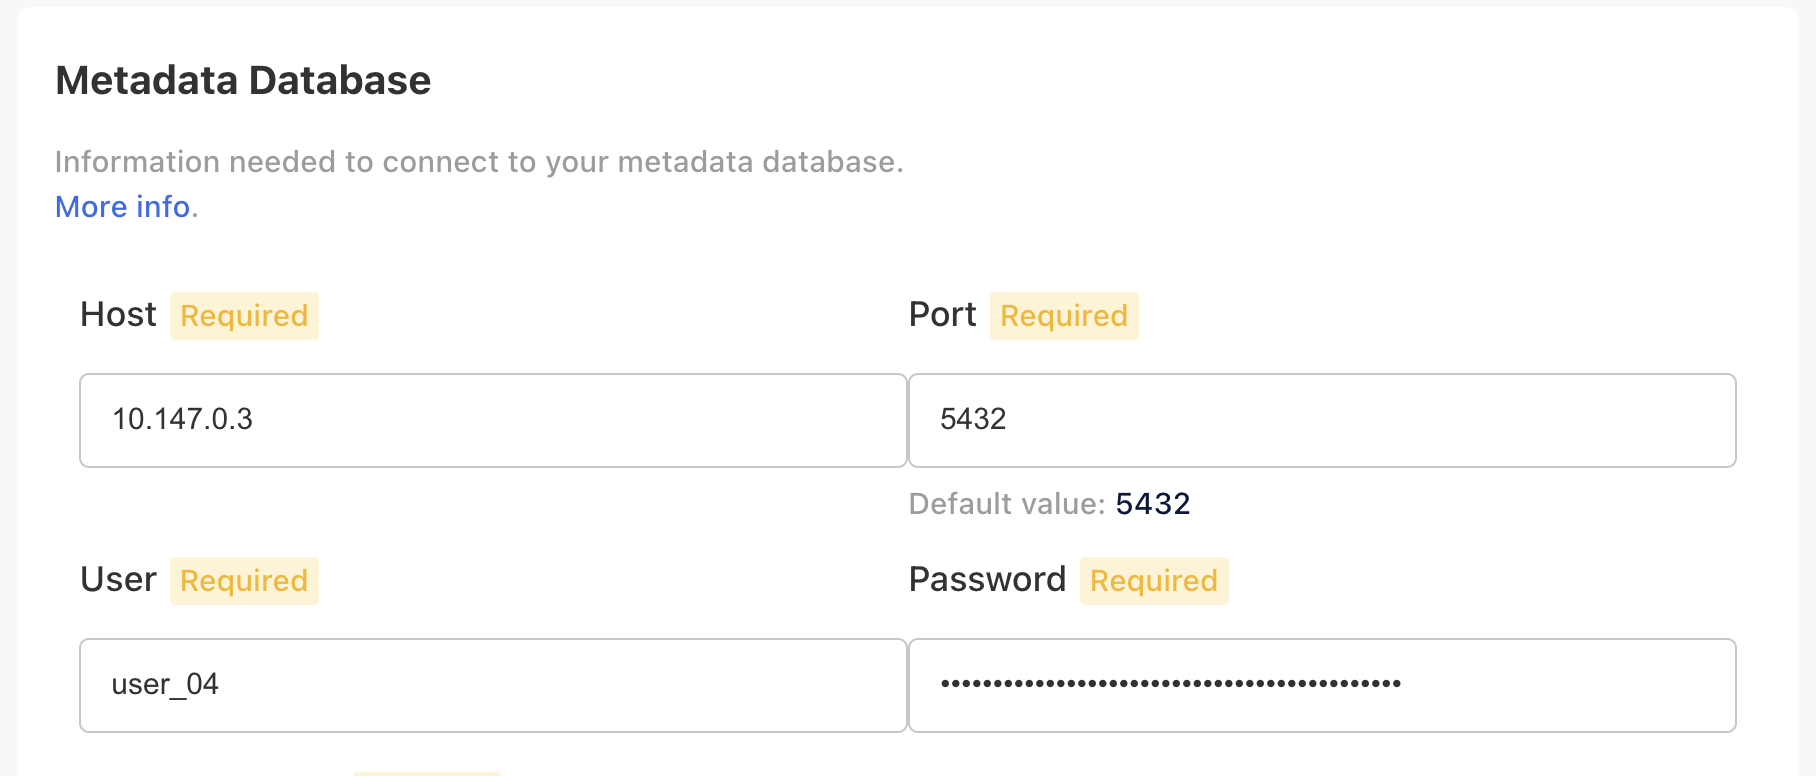
* Locate the **Metadata Database** configuration section.
* Note the value in the **User** field.
#### 1.1.2 Grant owner permissions
The database user identified in the previous step must have ownership permissions over the new AI database. Replace `` with the user you identified in step 1.2.
```sql
GRANT ALL PRIVILEGES ON DATABASE aiproxy TO ;
ALTER DATABASE aiproxy OWNER TO ;
```
### 1.2 Increase load balancer timeout
AI-generated responses often require longer processing times than standard HTTP requests. As those requests usually take less than 1 minute, but they can go up to 5 minutes, it's required to allow longer requests in the CARTO Self-Hosted platform.
Therefore, you'll have to increase the idle timeout on the Load Balancer exposing the CARTO service to allow requests taking up to **300 seconds (5 minutes).**
CARTO already manages expected timeouts for each API at the service level to ensure that requests taking longer than expected don't block the operations performed by the platform, so it's not required to specify different timeout values depending on the request at your load balancer level.
{% hint style="info" %}
Note: This configuration varies by provider (e.g., `idle_timeout.timeout_seconds` in AWS ALB, or `keepalive_timeout` in NGINX). You need to handle this configuration in your respective setup.
{% endhint %}
{% endtab %}
{% tab title="Helm" %}
### 1.1 Check that an external database is configured
To setup AI Features in CARTO Self-Hosted you need to already be using an external PostgreSQL metadata database. In legacy versions of CARTO Self-Hosted we provided an internal database that could be deployed as part of our Helm chart. If you're still using it, please get in touch with [CARTO Support team](mailto:support@carto.com) to plan the migration to an external database.
You can verify if you're using the internal database with the following command:
```bash
helm get values -n -o yaml | yq '.internalPostgresql.enabled'
```
### 1.2. Create 'aiproxy' database
The AI Proxy service requires its own dedicated logical database within your PostgreSQL instance. The default recommended name is `aiproxy`.
* Connect to your PostgreSQL instance and run:
```sql
CREATE DATABASE aiproxy;
```
### 1.3. Identify the database user
You must identify the specific database user currently configured for your deployment to grant it permissions later.
#### 1.3.1 Connect to Kubernetes Cluster
* **Connect to your Kubernetes cluster** where CARTO is deployed using `kubectl` cli tool .
* **Verify connection**: check that you are in the correct cluster.
```bash
kubectl cluster-info
kubectl config current-context
```
* **List namespaces** to find your deployment:
```bash
kubectl get namespaces
```
* Note the CARTO namespace ``.
#### 1.3.2 Find your Helm Release
* Make sure that you have **`helm` cli tool installed** .
* Run the following Helm command to **get the release name**:
```bash
helm list -A
```
* Note the CARTO release name `` (first column named "NAME").
#### 1.3.3 Get the Metadata Database user name:
1. Based on the previous information about the release name:
```bash
helm get values -n -o yaml | yq '.externalPostgresql.user'
```
### 1.4 Grant owner permissions
The database user identified in the previous step must have ownership permissions over the new AI database. Replace `` with the user you identified in step 1.2.
```sql
GRANT ALL PRIVILEGES ON DATABASE aiproxy TO ;
ALTER DATABASE aiproxy OWNER TO ;
```
### 1.5 Increase load balancer timeout
AI-generated responses often require longer processing times than standard HTTP requests. As those requests usually take less than 1 minute, but they can go up to 5 minutes, it's required to allow longer requests for the CARTO Self-Hosted platform.
Therefore, you'll have to increase the idle timeout on the Load Balancer exposing the CARTO service to allow requests taking up to **300 seconds (5 minutes).**
CARTO already manages expected timeouts for each API at the service level to ensure that requests taking longer than expected don't block the operations performed by the platform, so it's not required to specify different timeout values depending on the request at your load balancer level.
{% hint style="info" %}
Note: This configuration varies by provider (e.g., `idle_timeout.timeout_seconds` in AWS ALB, or `keepalive_timeout` in NGINX). You need to handle this configuration in your respective setup.
{% endhint %}
{% endtab %}
{% endtabs %}
## 2. Modify Configuration
Once the infrastructure prerequisites are met, you must enable the CARTO AI Pre-requisites.
{% tabs %}
{% tab title="Kots" %}
### 2.1 Enable CARTO AI Pre-requisites
* Navigate to the **Config** tab in the **Admin Console.**
* Scroll down to the **Advanced Config** section.
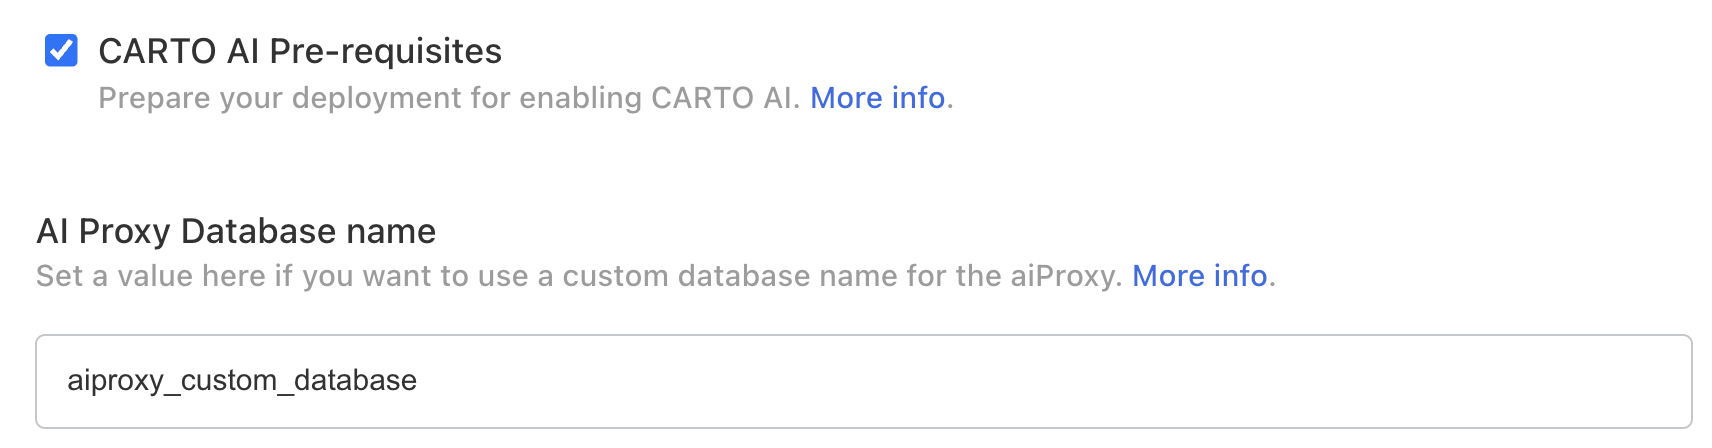
* Locate the **CARTO AI Pre-requisites** subsection. Check the box :heavy\_check\_mark:**.**
* Go to the bottom of the page and click on **Save Config**.
* Click on **Go to updated version**.
### 2.2 Optional: Setup a Custom Database name for AI Proxy
By default, the system expects the database name to be `aiproxy`. If you created a database with a different name in Step 1.1, you must specify it here.
* In the same **Advanced Config** section, locate the **AI Proxy Database** name field.
* Enter your *custom database name* (e.g., `aiproxy_custom_database`).
* Go to the bottom of the page and click on **Save Config**.
* Click on **Go to updated version**.
{% endtab %}
{% tab title="Helm" %}
Add the following lines to your `customizations.yaml` file:
```yaml
appConfigValues:
## Enable CARTO AI Pre-requisites
aiFeaturesEnabled: true
```
* If you used a different database name from the recommended `aiproxy` default, you need to set the following value:
```yaml
externalPostgresql:
## [... existing config...]
## aiproxy database for AI functionalties
aiProxyDatabaseName: ""
```
{% endtab %}
{% endtabs %}
## 3. Deploy updated version
Saving the configuration generates a **new version** that **must be deployed to apply the changes**.
{% tabs %}
{% tab title="Kots" %}
### 3.1 Initiate Deployment
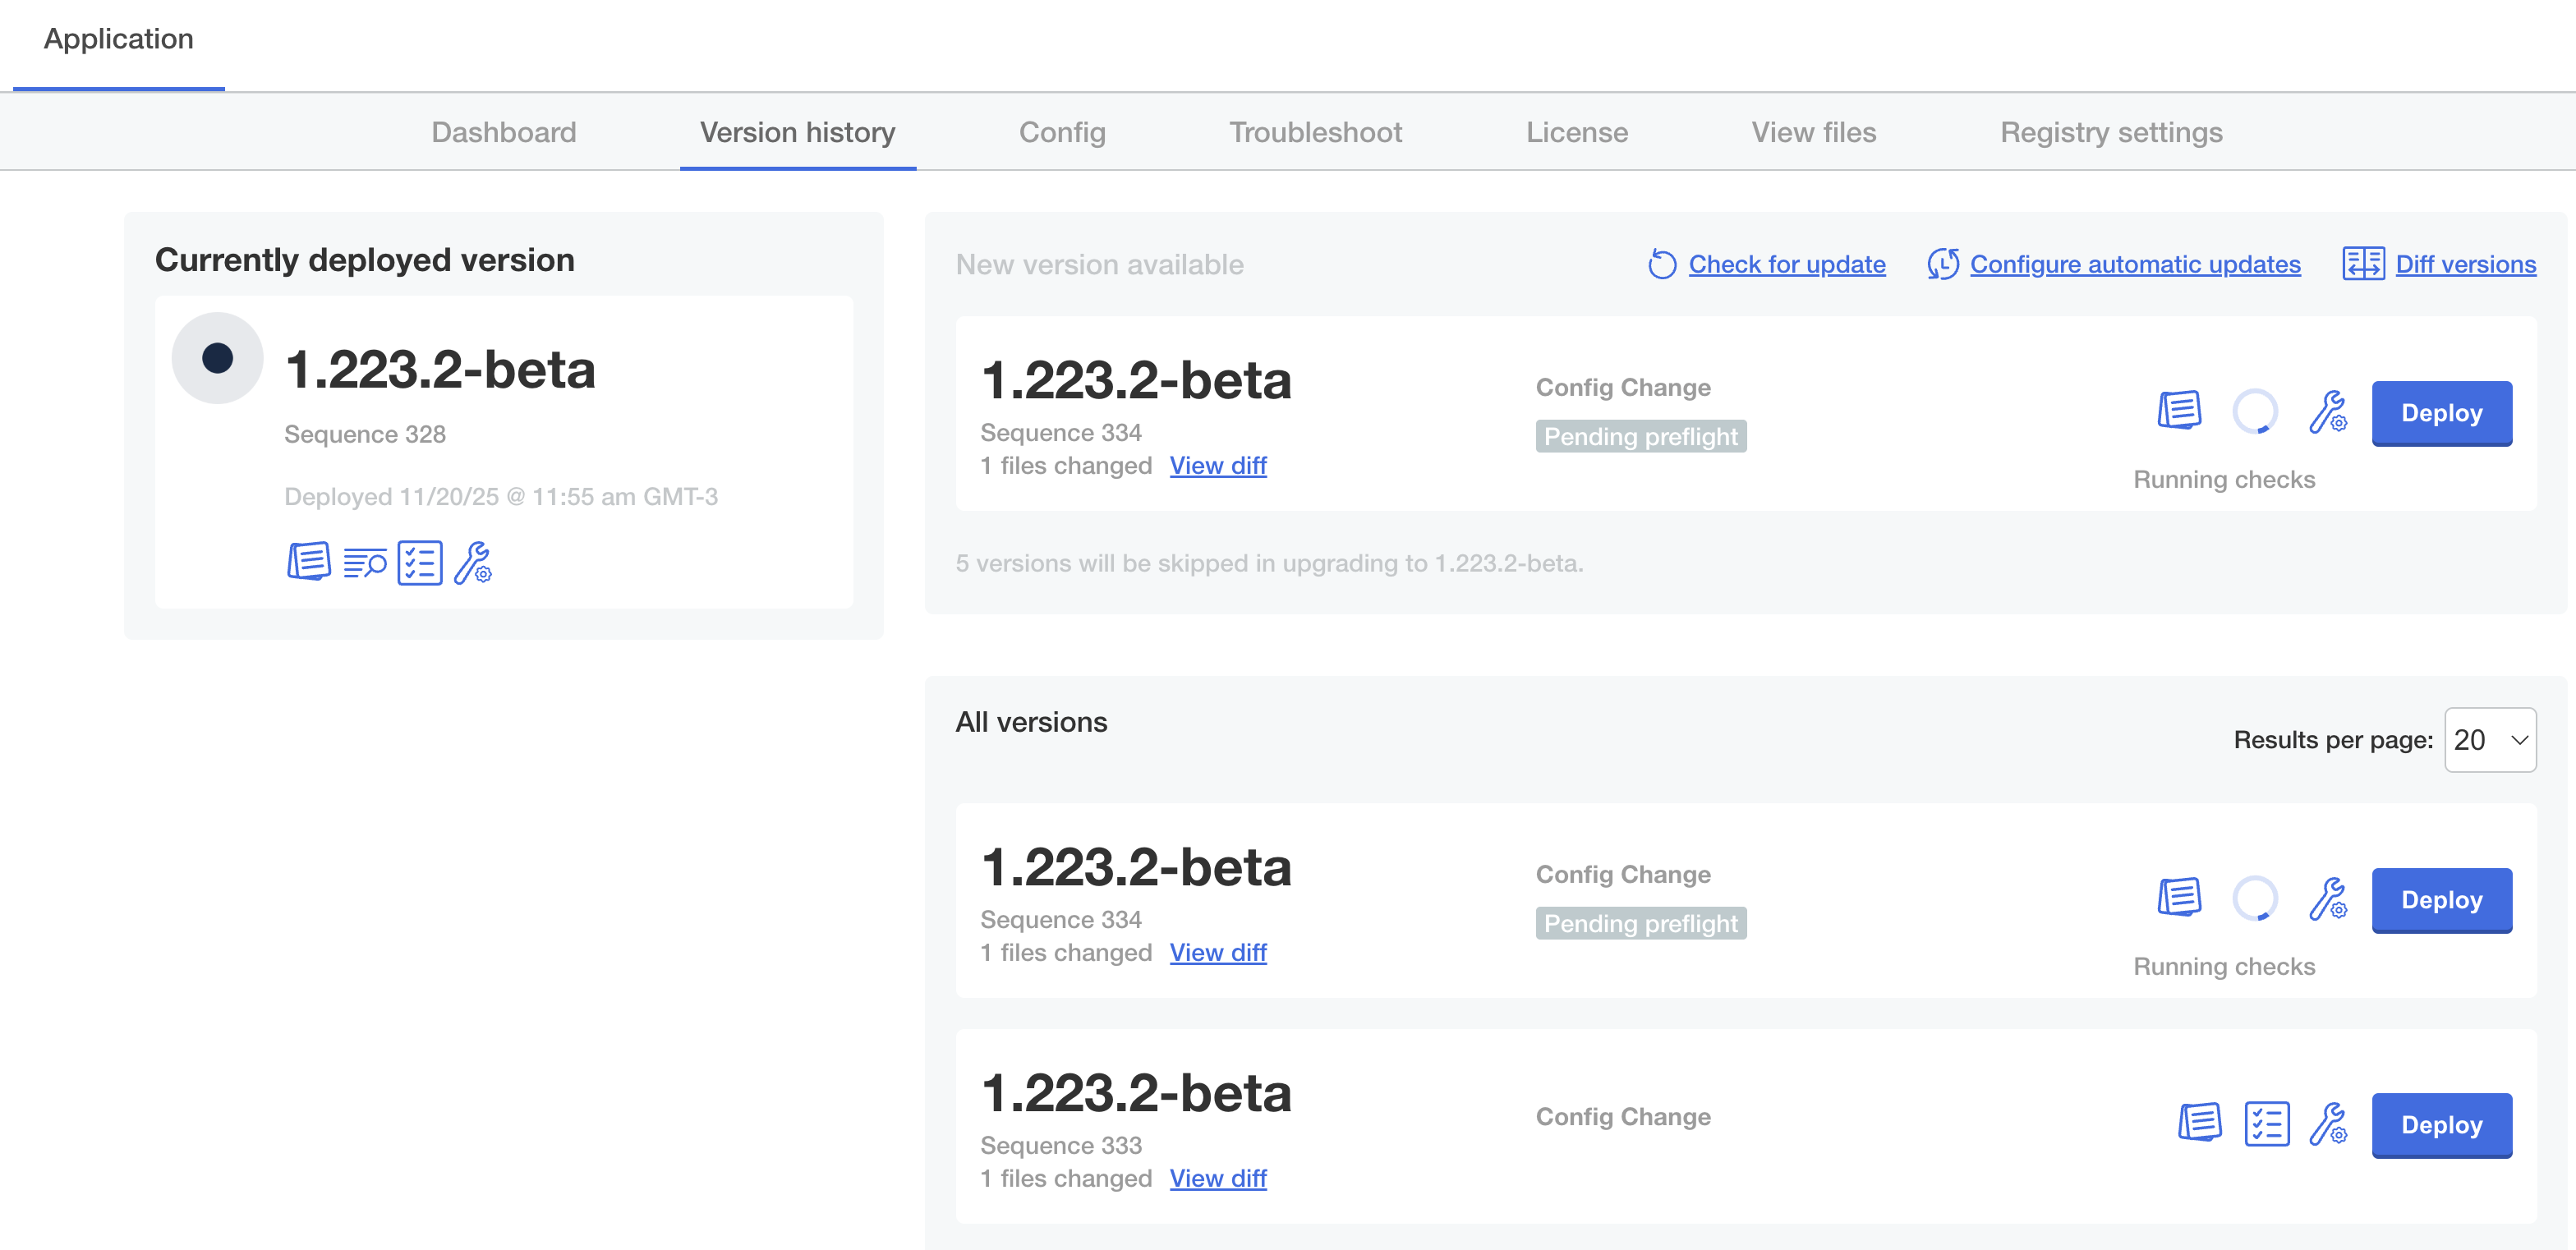
* Go to the **Version history** tab.
* Locate the new version Available.
### 3.2 Preflight checks
KOTS will automatically run preflight checks to ensure connectivity and requirements are met.
* Check that the **Preflight** checks ran correctly.
* If you click on the **View Preflight checks** icon you'll be able to see all details
### 3.3 Deploy
Now that we enabled the new settings, and made sure that the Preflight Checks are healthy we can go ahead and deploy it to the cluster.
* Click on the **Deploy** Icon, and then click on **Yes, Deploy**. b
* Now the new CARTO version is being deployed with the AI Pre-requisites enabled!
### 3.4 Monitor deploy
Once you deployed the new version you must check that everything gets deployed sucessfully and that your application is healthy.
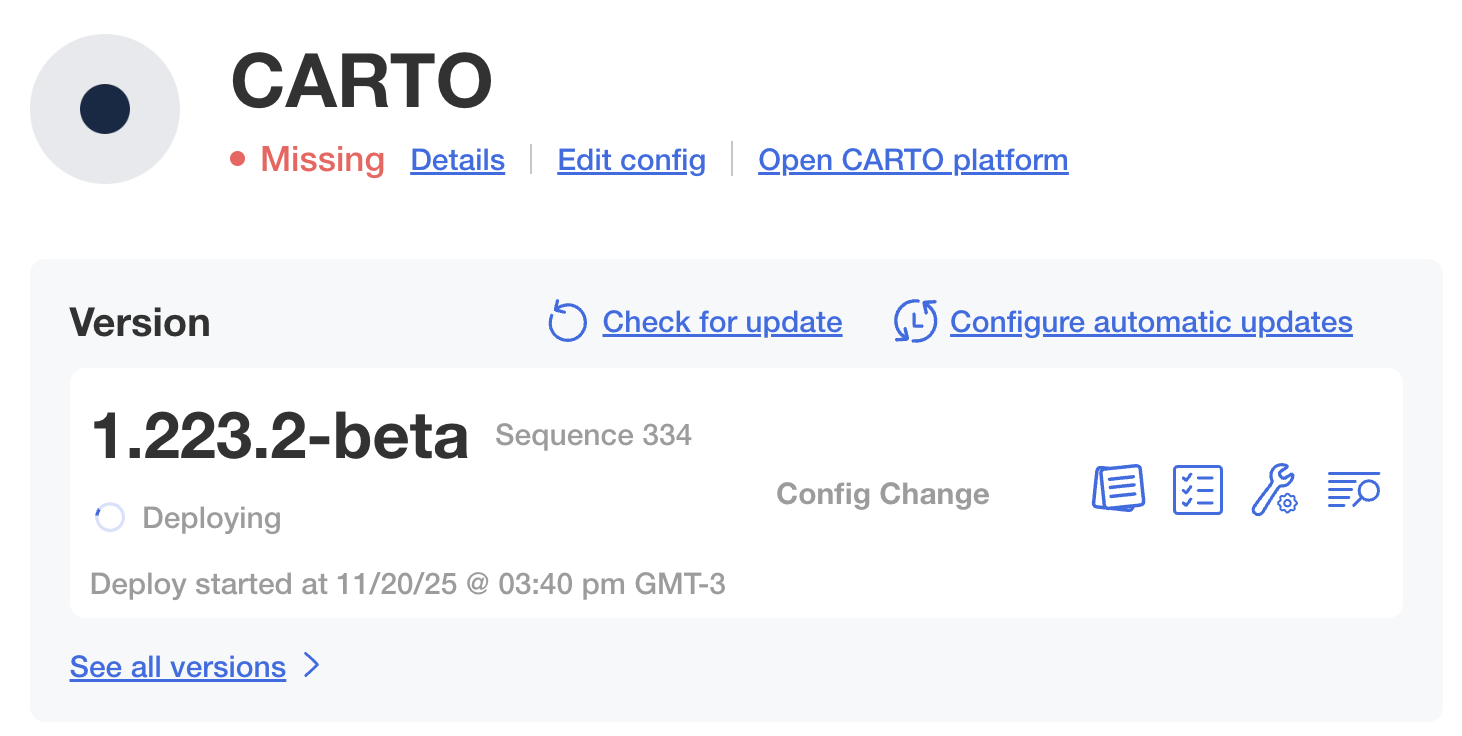
* In the **Dashboard** section, click on **Details**.
* You'll see that your **Resources** are updating:
* Once the the upgrade finishes you will see all Resources in **Ready** **state**.
{% endtab %}
{% tab title="Helm" %}
Apply the updated `customizations.yaml` using the standard Helm upgrade process for your CARTO Self-Hosted deployment. Verify that the AI proxy resources are created and running successfully in your cluster.
{% endtab %}
{% endtabs %}
## 4. Next steps
With the prerequisites deployed, you can now enable and configure CARTO AI from the workspace UI. Continue with [Enabling CARTO AI](/carto-user-manual/settings/carto-ai.md#enabling-carto-ai).
---
# Agent Instructions
This documentation is published with GitBook. GitBook is the documentation platform designed so that both humans and AI agents can read, navigate, and reason over technical content effectively. Learn more at gitbook.com.
## Querying This Documentation
If you need additional information that is not directly available in this page, you can query the documentation by asking a question.
Perform an HTTP GET request on the following URL with the `ask` and `goal` query parameters:
```
GET https://docs.carto.com/carto-self-hosted/configuration/ai-features/configure-carto-ai-prerequisites.md?ask=&goal=
```
`ask` is the immediate question: it should be specific, self-contained, and written in natural language.
`goal` is what the user is ultimately trying to achieve, the reason they need the answer. Sharing it helps GitBook give you a better, more relevant answer. A goal is most helpful when it describes the outcome the user wants rather than restating the question. For example, with `ask=how do I create an API token`, a goal like `automate deployments from our CI pipeline` lets GitBook tailor the answer to that use case.
The response will contain a direct answer to the question and relevant excerpts and sources from the documentation.
Use this mechanism when the answer is not explicitly present in the current page, you need clarification or additional context, or you want to retrieve related documentation sections.
 ### 1.1. Create 'aiproxy' database
The AI Proxy service requires its own dedicated logical database within your PostgreSQL instance. The default recommended name is `aiproxy`.
* Connect to your PostgreSQL instance and run:
```sql
CREATE DATABASE aiproxy;
```
#### 1.1.1 Identify the database user
You must identify the specific database user currently configured for your deployment to grant it permissions later.
* Login to the **KOTS** **Admin Console.**
* Navigate to the **Config** tab.
* Locate the **Metadata Database** configuration section.
### 1.1. Create 'aiproxy' database
The AI Proxy service requires its own dedicated logical database within your PostgreSQL instance. The default recommended name is `aiproxy`.
* Connect to your PostgreSQL instance and run:
```sql
CREATE DATABASE aiproxy;
```
#### 1.1.1 Identify the database user
You must identify the specific database user currently configured for your deployment to grant it permissions later.
* Login to the **KOTS** **Admin Console.**
* Navigate to the **Config** tab.
* Locate the **Metadata Database** configuration section.
 ### 1.1 Check that an external database is configured
To setup AI Features in CARTO Self-Hosted you need to already be using an external PostgreSQL metadata database. In legacy versions of CARTO Self-Hosted we provided an internal database that could be deployed as part of our Helm chart. If you're still using it, please get in touch with [CARTO Support team](mailto:support@carto.com) to plan the migration to an external database.
You can verify if you're using the internal database with the following command:
```bash
helm get values -n
### 1.1 Check that an external database is configured
To setup AI Features in CARTO Self-Hosted you need to already be using an external PostgreSQL metadata database. In legacy versions of CARTO Self-Hosted we provided an internal database that could be deployed as part of our Helm chart. If you're still using it, please get in touch with [CARTO Support team](mailto:support@carto.com) to plan the migration to an external database.
You can verify if you're using the internal database with the following command:
```bash
helm get values -n