> For the complete documentation index, see [llms.txt](https://docs.carto.com/llms.txt). Markdown versions of documentation pages are available by appending `.md` to page URLs; this page is available as [Markdown](https://docs.carto.com/carto-for-agents/connect-your-platform/microsoft-copilot-studio.md).
# Microsoft Copilot Studio
[Microsoft Copilot Studio](https://www.microsoft.com/en-us/microsoft-copilot/microsoft-copilot-studio) connects to CARTO as an **MCP tool** for your Copilot agents. A maker can configure the connection directly in Copilot Studio, and OAuth gives the agent access to the **full CARTO tool surface**. You can also upload the [CARTO Agent Skills](/carto-for-agents/agent-skills.md) to the same agent so it uses the CARTO tools well.
## Requirements
* A Microsoft 365 account with a **Copilot Studio license**.
* Your CARTO **MCP Server URL**.
* For the full tool surface, a CARTO **SPA OAuth Client** with a **Client ID and Secret**. See [Connecting with OAuth](/carto-for-agents/mcp-server/connecting-with-oauth.md#1-create-the-client-in-carto).
* **Generative orchestration** must be enabled for the agent. Otherwise, the MCP tools won't be invoked.
{% hint style="info" %}
**Generative orchestration must be enabled for the agent to use MCP tools.** See Microsoft's [MCP documentation for Copilot Studio](https://learn.microsoft.com/en-us/microsoft-copilot-studio/agent-extend-action-mcp?utm_source=chatgpt.com).
{% endhint %}
## Connecting via OAuth
OAuth provides access to the **full CARTO tool surface**, including map and Workflow authoring.
1. In CARTO, create a **SPA OAuth Client** under **Developers > Credentials > SPA OAuth Clients**.
* For **Application Login URI**, a placeholder such as `https://global.consent.azure-apim.net/redirect` is sufficient.
* Keep the **Client ID** and **Client Secret**.
2. In Copilot Studio, open your agent, go to **Tools > Add a tool > Add new MCP**.
3. Configure the MCP connection:
* **Server URL:** your CARTO MCP Server URL.
* **Authentication: OAuth 2.0**, Configuration type **Manual**.
* **Authorization URL:** `https://auth.carto.com/authorize`
* **Token URL** / **Refresh URL:** `https://auth.carto.com/oauth/token`
* **Scopes:** `openid profile email read:workflows write:workflows`
* **Client ID / Secret:** from step 1.
4. Save the configuration. Copilot Studio generates a **per-connector redirect URL** that ends in a connector-specific ID, for example `https://global.consent.azure-apim.net/redirect/`. Copy it.
5. Back in CARTO, open the SPA OAuth Client and turn off **Use default logout/callback URLs and Origins**. Add the Copilot-generated URL to **Allowed Callback URLs**, then save the client.
* Use the full per-connector URL, not the bare `https://global.consent.azure-apim.net/redirect` placeholder from step 1. The bare URL won't complete sign-in.
* If you recreate or rename the MCP Server in Copilot Studio, it gets a new redirect URL. Add the new one to **Allowed Callback URLs**.
6. In Copilot Studio, create the connection and complete the **CARTO sign-in** in the popup.
{% hint style="warning" %}
Don't use Copilot Studio's **Dynamic discovery** option. It relies on dynamic client registration, which CARTO doesn't use. Always choose **Manual**.
{% endhint %}
{% hint style="info" %}
**Two-step connection:** The connection showing as active in the authoring screen isn't always enough. When the agent is used in chat, the end user may need to complete a second connection through **Open connection manager → Connect → Submit**, or click **Retry** in the chat. Each user connects individually. This is expected.
{% endhint %}
{% hint style="info" %}
**Reconnect after 24 hours.** The connection lasts 24 hours from sign-in. After that, CARTO tool calls fail as unauthorized until the user reconnects and signs in again. See [How long a connection lasts](/carto-for-agents/mcp-server/connecting-with-oauth.md#how-long-a-connection-lasts).
{% endhint %}
## Read-only alternative
For **browse-and-query use cases**, you can skip OAuth and use a CARTO API Access Token instead.
1. In Copilot Studio, open your agent and go to **Tools > Add a tool > Add new MCP**.
2. Enter the **Server name**, **Description**, and **Server URL**.
3. Under **Authentication**, select **API key**.
* **Type:** **Header**
* **Header name:** `Authorization`
4. Create a connection using: `Bearer ` Include the `Bearer` prefix.
5. On your first message, complete the connection prompt by selecting **Connect > Submit** and wait for the connection to show as **Connected**.
This provides the [**read-and-discovery subset**](/carto-for-agents/mcp-server/connecting-with-api-tokens.md#what-a-token-unlocks) **of the CARTO tool surface**. It does not enable map or Workflow authoring, and the available tools depend on the data API scopes carried by the CARTO API Access Token
{% hint style="warning" %}
If both an OAuth MCP tool and an API-key MCP tool are enabled, disable one. Otherwise, the orchestrator may select the API-key connection and expose the smaller read-and-discovery tool surface instead of the full OAuth surface.
{% endhint %}
## Add the CARTO Agent Skills
[CARTO Agent Skills](/carto-for-agents/agent-skills.md) are playbooks that teach the agent how to use the CARTO tools well. They cover which tool to reach for, the right SQL dialect for each warehouse, and recipes for common spatial analyses. You add them to the same agent that has the CARTO MCP tool.
1. **Download the skills.** Each skill is a ZIP file in the **Download** column of the [Skills catalog](/carto-for-agents/agent-skills/skills-catalog.md).
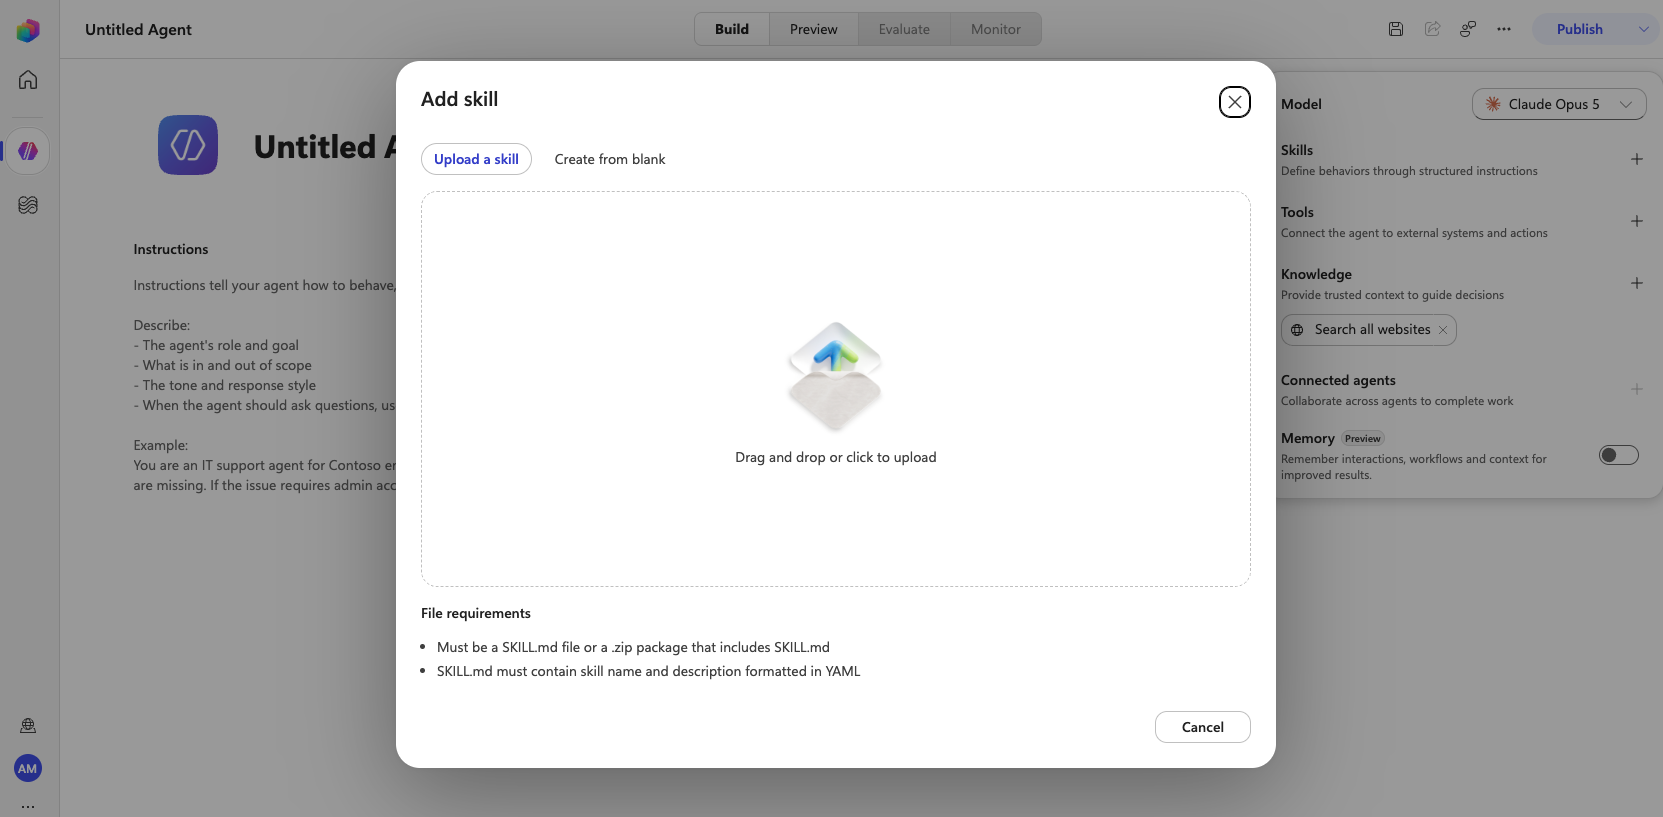
2. **Open the skill upload.** In Copilot Studio, open your agent on the **Build** tab. Next to **Skills**, click **+**, then choose **Upload a skill**.
3. **Upload each skill.** Drag and drop a skill ZIP, or click to choose it. Each ZIP holds one skill, so repeat this for every skill you want.
4. **Use them.** Ask something CARTO-specific, such as "List my CARTO maps". The agent picks the matching skill and calls the CARTO MCP tool.
{% hint style="info" %}
Skills build on each other, and uploading one doesn't add its dependencies. Start with the four utility skills (`carto-basics`, `carto-connect-datawarehouse`, `carto-query-datawarehouse`, `carto-explore-datawarehouse`) plus `carto-create-builder-maps`. Add use-case skills such as `carto-hotspot-analysis` after that. See [Dependencies and routing](/carto-for-agents/agent-skills/skills-catalog.md#dependencies-and-routing).
{% endhint %}
---
# Agent Instructions
This documentation is published with GitBook. GitBook is the documentation platform designed so that both humans and AI agents can read, navigate, and reason over technical content effectively. Learn more at gitbook.com.
## Querying This Documentation
If you need additional information that is not directly available in this page, you can query the documentation by asking a question.
Perform an HTTP GET request on the following URL with the `ask` and `goal` query parameters:
```
GET https://docs.carto.com/carto-for-agents/connect-your-platform/microsoft-copilot-studio.md?ask=&goal=
```
`ask` is the immediate question: it should be specific, self-contained, and written in natural language.
`goal` is what the user is ultimately trying to achieve, the reason they need the answer. Sharing it helps GitBook give you a better, more relevant answer. A goal is most helpful when it describes the outcome the user wants rather than restating the question. For example, with `ask=how do I create an API token`, a goal like `automate deployments from our CI pipeline` lets GitBook tailor the answer to that use case.
The response will contain a direct answer to the question and relevant excerpts and sources from the documentation.
Use this mechanism when the answer is not explicitly present in the current page, you need clarification or additional context, or you want to retrieve related documentation sections.